
| TL;DR — Quick Answer
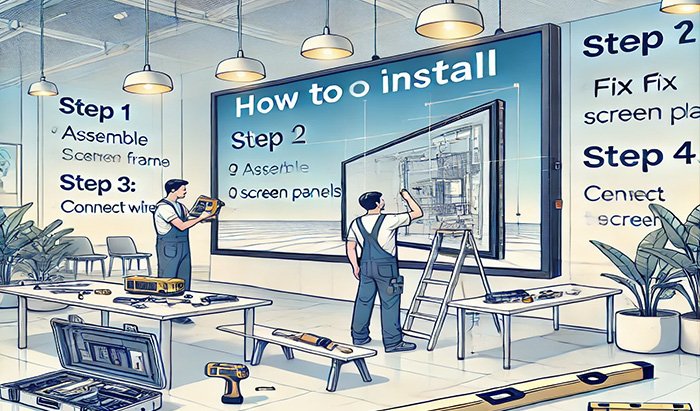
Installing an SMD screen properly involves nine core stages: site survey, specification selection (pixel pitch, brightness, IP rating), structural design, electrical and cabling setup, cabinet assembly and mounting, sealing and weatherproofing, calibration, content management system setup, and final inspection. Skipping the site survey or attempting structural mounting without proper engineering calculations are the most common causes of poor performance or safety issues after installation. While small indoor units can sometimes be self-installed, most SMD screen projects, especially outdoor or large-format ones, require professional installation to get structural safety, weatherproofing, and calibration right. Smart One Technologies handles every stage of SMD screen installation across Pakistan, from initial site survey to final content system handover. |
Buying an SMD screen is the easy part. Getting it properly installed — mounted safely, wired correctly, sealed against weather if it’s outdoors, and calibrated so the image actually looks right — is where most of the real work, and most of the risk, actually lives. A screen with excellent specifications can still underperform badly if the installation cuts corners on structural mounting, cabling, or calibration. This guide walks through exactly what a proper SMD screen installation involves, step by step, so buyers know what to expect and what questions to ask any installer before work begins.
Whether the plan is to hire a professional team for the entire process or simply to understand what’s actually involved before signing off on a vendor’s proposal, knowing each stage in advance makes it far easier to spot a rushed job before it becomes a costly problem.
Before You Begin: Pre-Installation Planning
Before any physical work starts, a few decisions need to be finalized: the exact mounting location, whether the installation is indoor or outdoor, the intended viewing distance, and how content will be managed once the SMD screen is live. Skipping this planning stage and jumping straight to installation is one of the most common reasons projects run into delays or costly rework partway through.
Step 1: Site Survey and Assessment
A proper installation starts with a physical site visit, not just a phone conversation. This step covers measuring available mounting space, checking structural load capacity of the wall or supporting frame, assessing sunlight exposure and viewing angles, and confirming existing electrical infrastructure can support the new display.
Step 2: Choosing the Right Specifications
With site conditions confirmed, the SMD screen specification gets finalized based on real data rather than assumptions:
- Pixel pitch: Matched to the actual minimum viewing distance measured during the survey.
- Brightness: Set according to ambient lighting conditions, especially for outdoor or window-facing installations.
- IP rating: Confirmed for outdoor builds, ensuring the cabinet can handle local weather conditions.
Step 3: Structural Design and Mounting Preparation
This stage covers designing the actual support structure — whether that’s a wall-mounted bracket system, a freestanding steel frame, or a ceiling-suspended rig for an indoor SMD screen. For larger installations, this includes wind-load calculations for outdoor builds and weight distribution planning to ensure the mounting structure can safely support the full cabinet array over years of use, not just on installation day.
Step 4: Electrical and Cabling Setup
Power supply capacity is confirmed and, where needed, upgraded to support the display’s full power draw. Cable routing is planned to keep wiring protected and discreet, with outdoor installations requiring sealed conduit and drainage-aware routing to prevent water ingress along cable pathways.
Step 5: Cabinet Assembly and Mounting
Individual LED cabinets are mounted onto the prepared structure in a planned sequence, with alignment checked continuously throughout the process. For a multi-cabinet SMD screen, even small gaps or misalignment between panels compound visibly across a larger surface, which is why this step is done methodically rather than rushed to meet a deadline.
Step 6: Weatherproofing and Sealing
For outdoor installations, every cabinet junction, cable entry point, and seam gets sealed to maintain the display’s rated IP protection. Drainage channels are checked to ensure water can’t pool inside the cabinet structure, and any gaps that could let dust or moisture reach internal electronics are closed before moving to the next stage.
Step 7: Calibration and Testing
Once physically installed, the SMD screen is calibrated as a single unified system — adjusting brightness and color uniformity across every cabinet so the display reads as one seamless image rather than a grid of individually lit panels. Testing is carried out under real conditions, including both daylight and night-time viewing for outdoor screens, before the installation is considered complete.
Step 8: Content Management System Setup
The sending and receiving cards are configured, and a content management system is installed and connected, allowing content to be scheduled or updated remotely. This is also when the client or end user is walked through the basic controls needed to manage day-to-day content without requiring a technician for routine updates.
Step 9: Final Inspection and Handover
A final walkthrough confirms structural mounting is secure, all cabling is properly protected, brightness and color are consistent across the SMD screen, and the content system is fully functional. Warranty documentation and basic operating instructions are handed over at this stage, closing out the installation process.
Common Installation Mistakes That Cause Problems Later
- Undersized structural support: Mounting hardware rated for the panel weight alone, without accounting for wind load or long-term fatigue, can fail well before the display’s rated lifespan.
- Rushed cabling without proper protection: Exposed or poorly routed cables are a common cause of intermittent faults that are difficult to diagnose after the fact.
- Skipping full-surface calibration: Calibrating cabinets individually rather than as one assembled unit often leaves visible brightness or color mismatches between panels.
- Ignoring ventilation in cabinet placement: Poor airflow around a mounted SMD screen can cause it to run hotter than rated, shortening component lifespan over time.
- No plan for future access: Failing to leave maintenance access behind or around the display makes routine servicing and repairs far more difficult than necessary.
Most of these mistakes trace back to the same root cause: treating installation as a quick add-on to the purchase rather than a distinct project phase requiring its own planning and expertise.
How Long Does a Properly Installed SMD Screen Last?
A correctly installed SMD screen with quality components typically performs reliably for 8 to 10 years before showing significant brightness degradation. That lifespan assumes the installation itself was done properly — a screen with excellent hardware but a rushed, corner-cutting installation can fail well before reaching its rated component life, whether through water damage from inadequate sealing, structural failure from undersized mounting, or premature component wear from poor ventilation.
This is exactly why installation quality deserves the same scrutiny as the hardware specification itself when comparing vendors — a slightly higher installation cost from an experienced team is often the difference between a display that reaches its full rated lifespan and one that needs costly repairs within the first two years.
DIY vs Professional Installation
A small indoor SMD screen on a stable wall might be within reach for a technically confident buyer to install with guidance. Most other installations — anything outdoor, anything elevated, anything spanning multiple cabinets — genuinely benefit from professional installation. The risks of a DIY attempt aren’t just cosmetic: incorrect structural mounting can create real safety hazards, improper sealing can void weatherproofing within the first rainy season, and skipped calibration steps can leave a screen with visible seams and inconsistent brightness for its entire operating life.
Why Choose Smart One Technologies for SMD Screen Installation
Every step outlined in this guide reflects the actual process Smart One Technologies follows on real installations across Pakistan, rather than a simplified summary. Operating since 2005, the company handles the full indoor and outdoor SMD screen installation process — site survey, structural engineering, cabling, calibration, and content system setup — as a single coordinated project rather than handing a buyer boxed hardware and a set of instructions.
Buyers can review completed installations on the Our Projects page, explore Hikvision Outdoor SMD Screen options, or learn more on the About page.
Businesses planning an installation can reach out through the Contact page to arrange a site survey.
Frequently Asked Questions
Can I install an SMD screen myself?
Small indoor units may be manageable for a technically confident buyer, but outdoor, elevated, or multi-cabinet installations generally require professional installation for structural safety, weatherproofing, and proper calibration.
How long does a typical SMD screen installation take?
This depends heavily on size and complexity, ranging from a single day for a small indoor display to several weeks for a large-format outdoor installation requiring structural engineering and extended calibration.
Why is calibration necessary after physical installation?
Individual LED cabinets can have slight brightness or color variance from manufacturing. Calibrating the full assembled screen as one system ensures uniform output across every panel, rather than visible seams between cabinets.
What happens if the site survey step is skipped?
Skipping the survey often leads to mismatched specifications, structural issues discovered mid-installation, or a final image size that doesn’t suit the actual viewing distance, all of which are costly to fix after the fact.
Does installation include the content management system setup?
Yes, a complete installation should include configuring the content management system and providing basic training, so the client can manage day-to-day content without requiring a technician for routine updates.
What’s the most common installation mistake that shortens an SMD screen’s lifespan?
Undersized structural support and poor ventilation are among the most common causes, often leading to premature component failure or safety issues well before the screen reaches its rated hardware lifespan.
Final Thoughts
Installing an SMD screen correctly is a multi-stage process where each step depends on the one before it — a rushed site survey leads to a mismatched specification, a rushed structural setup leads to safety risks, and skipped calibration leads to a screen that never looks quite right. Understanding this process, whether tackling a small installation independently or hiring a professional team for a larger one, is what separates a display that performs reliably for years from one that causes problems from day one.
The most reliable installations aren’t the fastest ones — they’re the ones where every stage, from the initial site survey through to final content system handover, gets the attention it actually needs before moving to the next step.
| Need a Professionally Installed SMD Screen?
Smart One Technologies handles every stage of SMD screen installation across Pakistan, from site survey to final calibration. Get a free site consultation and quote today. 📞 +92 321 408 6763 | ✉ sales@sot.com.pk | www.sot.com.pk |

0 Comments on “How to Install an SMD Screen: A Step-by-Step Guide”